Wild animals do not move in by accident. They follow shelter, food, and easy access, and they will keep returning if those incentives remain. A professional wildlife removal team can solve the immediate problem, but your preparation before the visit determines how smoothly the service goes and how well your home stays protected afterward. I have walked into crawlspaces where a simple pre-visit vacuuming saved an hour of detective work, and I have postponed attic trapping because the homeowner had scattered mothballs that masked the musky raccoon odor we needed to track. Preparation is not about doing the technician’s job for them. It is about giving them clear information, safe access, and a stable environment so they can work efficiently and choose the right strategy.
This guide explains how to prepare, why these steps matter, and how to think about trade-offs. It draws on the practical realities that wildlife control professionals see every week: skeptical squirrels in mid-January, bats hiding behind loose fascia, opossums in floor voids, and rats that treat improperly stored pet food like bait.
Start with a clear picture of the problem
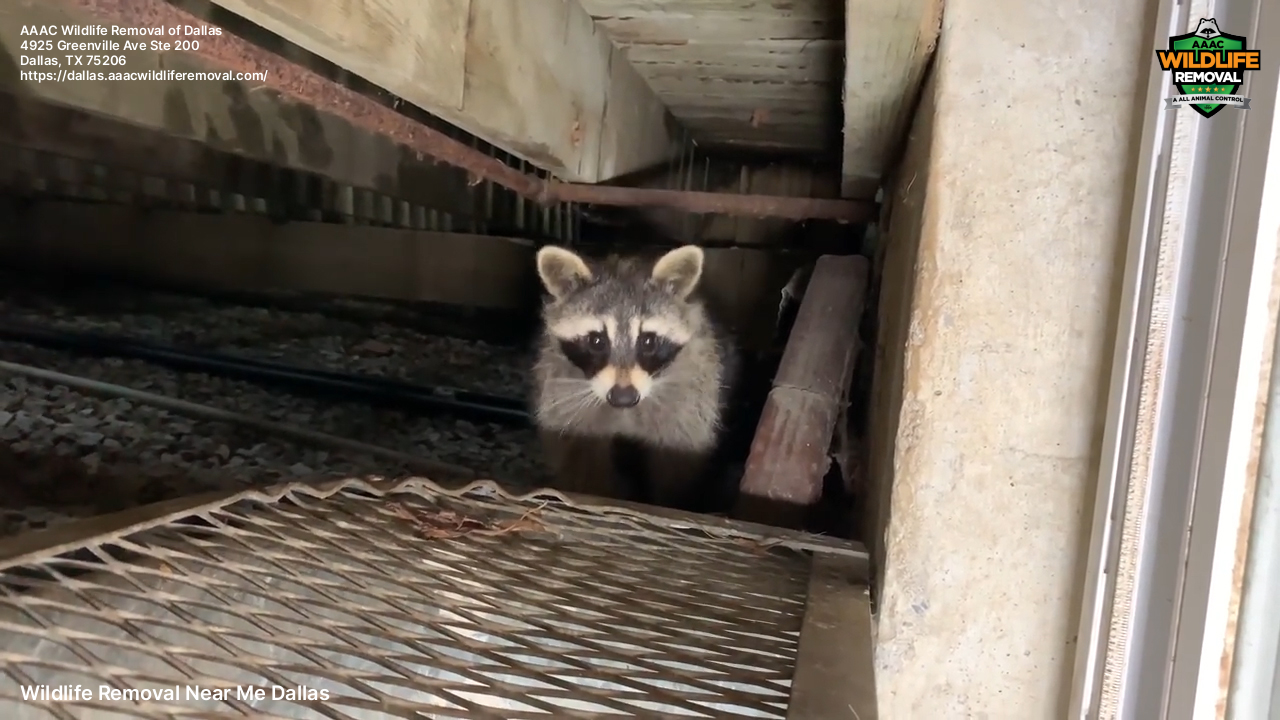
Before you call a wildlife trapper, take two or three quiet minutes at dawn or dusk and just listen. Most species keep a schedule. Squirrels move at first light and before dusk, raccoons favor late night, mice leave pepper-flake droppings along baseboards, and bats show up as faint squeaks and a dark ribbon of guano along a seam. You do not need to identify the exact species, but you should note patterns that matter to the plan.
Write down where you have heard or seen activity and how often. If you have a security camera, doorbell cam, or simple wildlife camera, check it for timestamps. One homeowner thought they had rats; their camera showed two adult raccoons squeezing under a lifted deck board at 11:42 p.m., every night, for a week. That changed everything about our approach.
Photos help, as long as you do not crawl into unsafe spaces to get them. Snap images of droppings, footprints in dust, smudges along rafters, chewed entry points, and displaced insulation. Do not clean or bleach these areas yet. A seasoned wildlife exterminator will use scent trails, hair caught on nails, and the color of droppings to make calls about species and den sites. Disturbing that evidence can set the process back.
Safety first, for you and the technician
Wildlife work is hands-on, and even the best pro cannot operate well in hazardous clutter. I have stepped into attics where loose boards masked joists, and into basements with standing water wicking up extension cords. Before the visit, address the basic hazards. You are not staging a renovation cleanup. You are creating safe, navigable paths.
Clear a path from the driveway to likely work areas. If the technician will need roof access, move vehicles away from the eaves and trim back any large planters or yard décor that could interfere with ladder placement. Indoors, clear access to attics, crawlspaces, utility closets, and breaker panels. If someone has to move the same box of holiday decorations six times just to reach the hatch, you will lose time.
Contain pets. A curious dog can topple a ladder or spook an already stressed raccoon. Secure cats in a room with food and water. Let the team know if any pets roam freely outdoors, especially if the plan includes traps or exclusion doors.
Locate and label breaker switches for attic lights, exterior outlets, and any attic-mounted HVAC equipment. In an older home, this alone can save half an hour of trial and error.
If you suspect a bat colony, avoid entering the attic until the inspection. Disturbance scatters them into soffits and wall voids, complicating humane exclusion and increasing the odds of an accidental indoor bat.
Avoid common DIY moves that backfire
Over the years I have lost count of mothball attics. Homeowners scatter them after reading an online tip, then wonder why the smell lingers. Mothballs introduce fumes and can mask the odor cues that lead us straight to the den. They rarely move animals out and sometimes drive them deeper into the structure.
Spray foams and quick patches create another headache. I have seen raccoons rip through a fresh foam plug in under twenty minutes, and squirrels treat foam like a chew toy. Worse, these patches hide the original hole geometry, so we cannot verify whether an entry is active. If you must cover an obvious opening temporarily for safety, use hardware cloth or a screwed-down sheet of plywood, and document what you did.
Poison is a separate category, and it belongs nowhere near a structural wildlife issue. Rodenticides can lead to animals dying in inaccessible spaces, producing odor problems that take weeks to resolve. Secondary poisoning risk to pets and non-target wildlife is real. Professionals will offer safer trapping, targeted baiting in locked stations when appropriate, and comprehensive wildlife exclusion to keep the problem from recurring.
Gather information the team will need
A wildlife control strategy blends behavior, building science, and logistics. When technicians arrive with context, they can plan placement efficiently and minimize return visits.
Provide the building age and any recent renovations. Roof replacement, new soffits, chimney liner installation, solar panel mounts, and additions often create gaps. I once traced a squirrel incursion to a new fascia board that left a finger-width gap at the drip edge. A roofer’s nail missed the rafter by half an inch.
Share your schedule, especially if interior traps might be set. If you work from home, the team may pest control prioritize discreet areas first. If you leave early each morning, they may position exterior traps to avoid attracting pets and neighborhood curiosity.
Let the technician know about neighboring issues. If the house next door is under renovation or there is an abandoned shed on the property line, wildlife may shift between structures. This matters for trap placement and for setting realistic expectations.
Prepare access points and staging areas
Attic access is a common choke point. Clear the immediate area below your attic hatch. nuisance wildlife management techniques If the hatch is in a closet, remove a few feet of clothing and shelving near it. The team may need to hoist ladders, carry traps, and bring in light stands. If insulation sits loose over the hatch edges, expect a small shower of dust. Cover nearby furniture with lightweight sheets if you are concerned.
In basements and crawlspaces, remove loose debris near the entry hatch. If you have a vapor barrier, note any tears. You do not need to roll it up or relocate insulation batts. We want to see the current conditions.
For exterior work, unlock gates. If you have a deck with limited clearance, identify the best access side and, if possible, remove a single plank near the apparent entry. Do not remove large sections. Stable structure helps us track edges and dens, and we may need to screw temporary doors or screens to the framing.
Food sources, water, and odors: prepare the environment
Wildlife exclusion works best when your property is uninteresting to animals. A raccoon family can be moved out with a one-way door, but if your trash consistently spills, they have a reason to probe the door until they find a weakness. Before the visit, firm up the basics.
Move trash and recycling into lidded containers. If a can lid is cracked or loose, tape it until you replace it. Nighttime raids can drag a simple job into a multi-visit saga.
Bring pet food and bird seed indoors. Garage storage is fine if the containers are sealed. Bird feeders deserve special mention. They are magnets for rodents and squirrels. If you cannot remove them entirely, at least pause feeding for a week around the service visit.
Check for water sources. Dripping hose bibs, shallow planters, and clogged gutters keep animals close. A dry perimeter reduces loitering and lowers the chance that new animals discover the same route.
If you use grills or smokers, clean the drip tray the day before the technician arrives. Grease odors travel and draw nocturnal prowlers.
What to expect from inspection through capture
A good wildlife trapper approaches a structure as an ecosystem. They will circle the building, scan rooflines, test soffits, check vents, and look for grease marks where bodies rub at entry points. Inside, expect a careful inspection of the attic perimeter, insulation voids, and any spots where utilities penetrate the envelope. They may dust for tracking, use thermal or borescope cameras, and leave small markers at suspect exits. None of this is theater. It informs trap choice, placement, and whether exclusion should be phased or immediate.
For squirrels, expect at least one exterior one-way door at the primary exit and spot exclusion of secondary gaps. For raccoons, the plan may include heavy-gauge doors and anchoring into framing, along with traps set at ground approach paths. For bats, humane exclusion requires timing outside maternity season in most states, plus a full seal of gaps larger than a pencil width. For rats and mice, the program blends sanitation, structural sealing, and targeted trapping. Your preparation reduces the guesswork that burns time.
This is also when we talk about trade-offs. A quick patch might resolve tonight’s noise, but if fascia gaps remain, you will hear scratching again within weeks. Budget matters. So does timing. I have advised homeowners to wait two weeks before exclusion when pups or kits are present. Rushing can separate mothers and young, leaving dead animals in walls and a smell no one wants. A candid conversation with your technician helps set a path that respects humane practices and your tolerance for short-term noise.
Children, tenants, and property managers
If you manage a rental or a multi-family building, preparation is part logistics, part diplomacy. Send a brief notice to tenants explaining that a wildlife removal team will need access to specific units and approximate times. Ask them to clear the areas under attic hatches and to secure pets. Share a contact number for day-of coordination. Tenants are more cooperative when they understand the safety reasons behind requests.
For families with children, set expectations in plain language. Tell them someone will be working in the attic or outside and that doors to certain rooms should stay closed. Curiosity is natural. Safety is non-negotiable. I have had to pause mid-install to escort a toddler away from a ladder base more than once.
The right way to clean before and after
Pre-visit cleaning should be light and targeted. Vacuum loose dust under the attic hatch, sweep stoops and deck areas where technicians may need to set equipment, and put away fragile items near work zones. Do not deep clean suspect areas, and do not bleach droppings. That comes later, under controlled conditions and with protective equipment.
Post-removal sanitation is essential. Feces and urine can carry pathogens, and saturated insulation loses R-value while holding odor. Ask your wildlife exterminator about their decontamination process. Some companies offer enzyme fogging and insulation removal and replacement. Others partner with remediation specialists. If you prefer to do some of the work yourself, at least consult on protective gear, disposal methods, and which materials can be cleaned versus which must be replaced.
From experience, minor mice activity along a short run of baseboard can be handled with careful cleaning, sealing, and snap-trap monitoring. A raccoon den in an attic corner with dark, matted insulation usually calls for removal of several feet beyond the visibly soiled area, because urine soaks outward. A bat roost under a ridge vent may leave a linear band of guano that looks tidy but requires full-length cleaning and sealing to prevent fungal growth. Assess with a pro’s help.
How exclusion differs from removal, and why both matter
People often ask if traps alone can solve a problem. Short answer: rarely. Wildlife exclusion is the discipline of sealing a structure so animals cannot enter in the first place. After a capture or a one-way release, exclusion closes the loop.
Expect to hear terms like “primary entry,” “secondary gap,” and “vulnerability map.” A vulnerability might be a ridge vent with a lifted cap, a furnace flue screen with quarter-inch play, or a seam where siding meets a gable. The technician may recommend hardware cloth, metal flashing, custom bent drip edges, and upgraded vent covers. None of this is glamorous. All of it matters.
Preparing for exclusion means accepting that a few small cosmetic changes might be visible along eaves or over vents. It also means choosing materials that match your climate. In humid coastal regions, stainless fasteners and heavier-gauge mesh resist corrosion. In cold climates, sealants need flexibility across temperature swings. Ask your provider to explain why they chose a particular method. A good answer will reference species behavior, not just price.
Seasonal timing changes the playbook
Breeding seasons limit options if you care about humane outcomes. In many areas, squirrels have litters in late winter and late summer, raccoons in spring, and bats in late spring through summer. If you schedule service during these windows, expect more inspection time and possibly a staged approach: first secure the perimeter minus the active nursery entrance, then install a one-way device after the young are mobile. I have persuaded homeowners to wait ten days that felt long in the moment and saved them weeks of odor management.
Weather matters too. Ice on a roof can delay exterior work. Heavy rain will wash away tracking dust and can spoil baits. If your appointment lands on a storm day, a reputable provider will reschedule for safety and effectiveness. Your preparation still pays off, as inspection can proceed indoors and materials can be staged for a quick return.
How to think about costs and warranties
Preparation can save money, but not always in ways that show up as line-item discounts. More often it prevents costly return visits. If the property is ready and access is clear, the team can complete inspection and initial exclusion in one trip. If pets are secured and neighbors informed, exterior traps can be placed optimally instead of cautiously, increasing capture speed.
Ask about warranties on wildlife exclusion, not just removal. A typical warranty ranges from six months to two years, sometimes more, and often covers re-entry of the same species at sealed points. A stronger warranty usually indicates confidence in materials and methods. It may also require that you maintain certain conditions, like keeping trees trimmed back from the roof by at least six feet. Preparation includes planning for those follow-on tasks.
Your role during the visit
You do not need to hover, but be available. Technicians often uncover surprises: a second attic cavity, a rotted fascia board that needs a carpenter, or a colony larger than anticipated. Quick decisions keep the day productive. Share your preferred contact method and stay within earshot, especially during the first hour of inspection and the last hour when plans are finalized.
If you want photos, ask for them. Many wildlife removal companies document their work as a matter of practice. Those images help you understand what you paid for and can guide future maintenance.
Avoid testing one-way doors or checking traps yourself unless the company instructs you. Human scent and disturbance can spook cautious animals into alternate exits or prevent trap entry. The technician will schedule checks that meet legal and humane standards.
A short pre-visit checklist
- Note times and locations of noises, droppings, or sightings. Gather any camera footage. Clear access to attic hatches, crawlspaces, and suspect exterior areas. Contain pets. Do not use mothballs, poison, or spray foam. Avoid deep cleaning of active areas. Secure trash, pet food, and bird seed. Pause feeders. Fix obvious water drips. Unlock gates, move vehicles from eaves, and be available for decisions during the visit.
After the animals are out: making the fix stick
Removal without follow-through invites a repeat performance. Once the immediate problem is resolved, schedule full wildlife exclusion if it was not completed on the first visit. Walk the property with the technician, or review photos, and understand what was sealed and what remains vulnerable. Commit to the simple ongoing habits that keep wildlife uninterested: closed lids, clean grills, trimmed vegetation that bridges rooflines, and stored pet food.
Consider an annual checkup, especially if your home sits near greenbelts, water, or mature tree canopies. A 30-minute exterior scan each year catches the lifted vent cap before a squirrel family does. Many companies bundle this with gutter cleaning or roof inspections.
For homeowners who like to do some maintenance, ask for a materials list that matches the installed exclusion. If your provider used galvanized quarter-inch hardware cloth and a specific sealant, keep those on hand for minor touch-ups. Avoid mixing metals that corrode when paired, and if you are unsure, call for guidance.
When to call sooner rather than later
The longer you wait, the more animals learn your house. A single scout squirrel can become a nesting pair in a week or two. A mouse problem rarely stays static, and raccoons in spring can turn one soffit gap into multiple entries in a night. Early intervention is kinder to the animals and cheaper for you.
There are also urgent scenarios. If you see a bat in a living space, isolate the room and call immediately. Public health guidelines often recommend testing for exposure if someone was sleeping in the room. If you smell gas in an attic or crawlspace while tracking wildlife, leave the area and call your utility. Animals sometimes chew lines. Do not treat that as a routine wildlife situation.
Choosing the right professional
There is a difference between pest control and wildlife control. Many companies do both well, but techniques and regulations differ by species and state. Ask whether the provider specializes in structural wildlife removal and exclusion. Verify licenses and insurance. Humane practices matter, both ethically and because they often lead to better outcomes. One-way doors combined with thorough sealing make re-entry less likely than catch-and-relocate without exclusion.
Clarity in the proposal is a good sign. It should identify the target species or likely suspects, outline inspection findings, explain the plan, and list the exclusion points and materials by type. If a quote simply says “trap and remove,” press for detail.
The payoff of good preparation
Preparation turns a chaotic chase into an orderly process. It helps the wildlife trapper read your home’s story without false leads, and it reduces stress for everyone involved. Your part is straightforward: preserve the clues, clear the paths, remove the temptations, and be ready to make decisions based on what the inspection finds.
I have seen it go both ways. In one case, a homeowner took fifteen minutes to jot notes and clear access. We found the squirrel run in ten minutes, installed a one-way door at the primary exit, sealed five secondary gaps, and wrapped it up in a single visit. In another, scattered repellents and hastily foamed holes forced us to reset, and the job stretched into three trips. Same species, similar houses, different prep.
Wild animals are resilient and clever, but they are also predictable when you understand their needs. Work with that reality. Give your wildlife removal team a clean stage and good information, and they will return your home to you faster, with fewer surprises, and with a solid plan to keep it that way.